Dynamic DDGI
Dynamic Diffuse Global Illumination is Vite's primary global illumination solution and the feature the fork is best known for. This page covers how it works, how to set it up, and how to tune it.
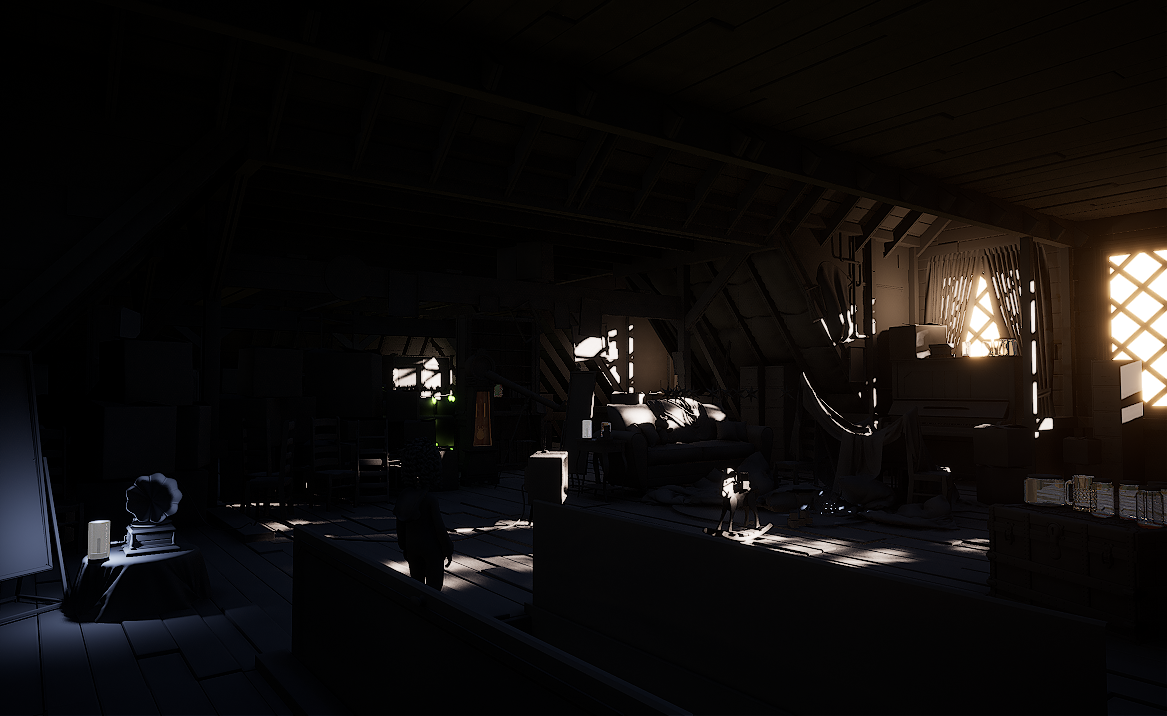
Direct lighting only. Everything the sun does not reach directly is black, because nothing is carrying light around the room.
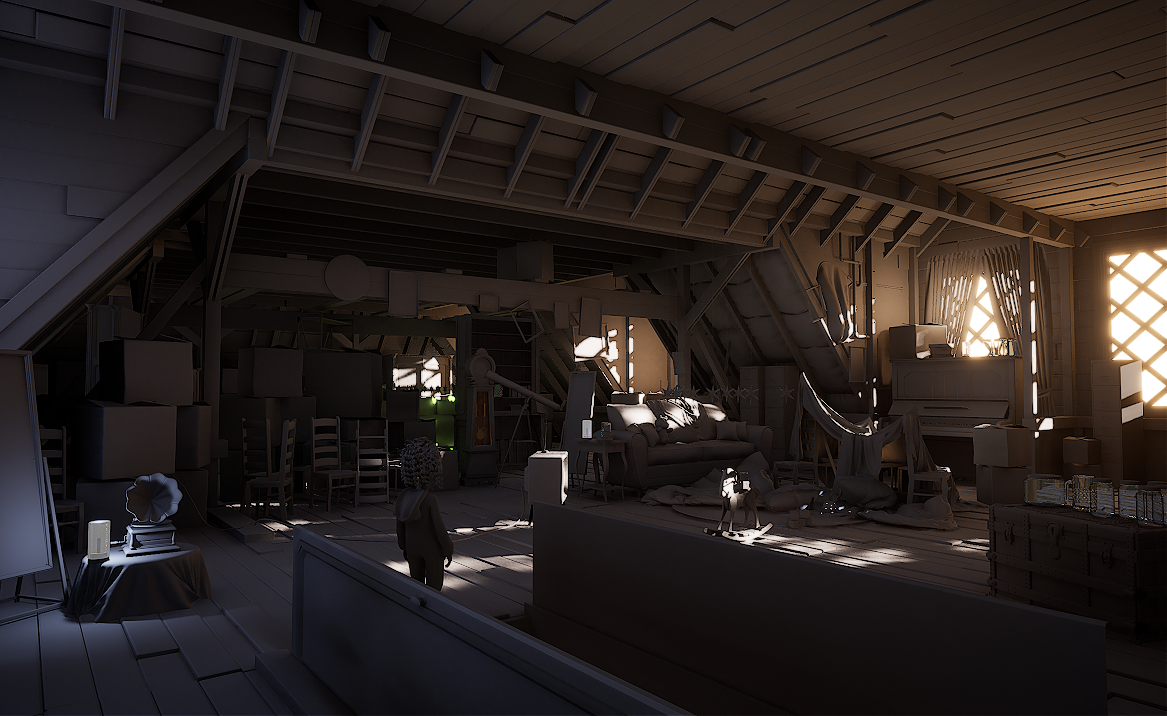
The same frame with Dynamic DDGI enabled. The ceiling, the boxes on the left and the space under the roof line are all lit entirely by bounce — and there is no noise to denoise, because probe irradiance is smooth by construction.
How it works
DDGI places a three-dimensional grid of probes across a volume. Each frame, a budget of rays is traced from each probe into the scene; the resulting radiance is accumulated into per-probe irradiance and depth textures, and stored using spherical harmonics.
Two properties follow from that representation, and they explain almost everything about DDGI's behaviour:
It is noise-free. Because irradiance is accumulated and filtered into a smooth basis over many frames rather than sampled per-pixel per-frame, the output has no stochastic noise and needs no denoiser. That is why DDGI does not exhibit the boiling, ghosting and temporal instability associated with denoised ray-traced GI.
It is coarse. Spatial resolution is bounded by probe spacing. Lighting detail finer than the probe grid does not exist in the representation. This is the reason SSGI is recommended alongside it.
The per-probe depth information is what prevents light leaking through thin geometry — probes know how far away the nearest surface is in each direction and can reject contributions that would have to pass through a wall. This is why DDGI leaks less than software Lumen.
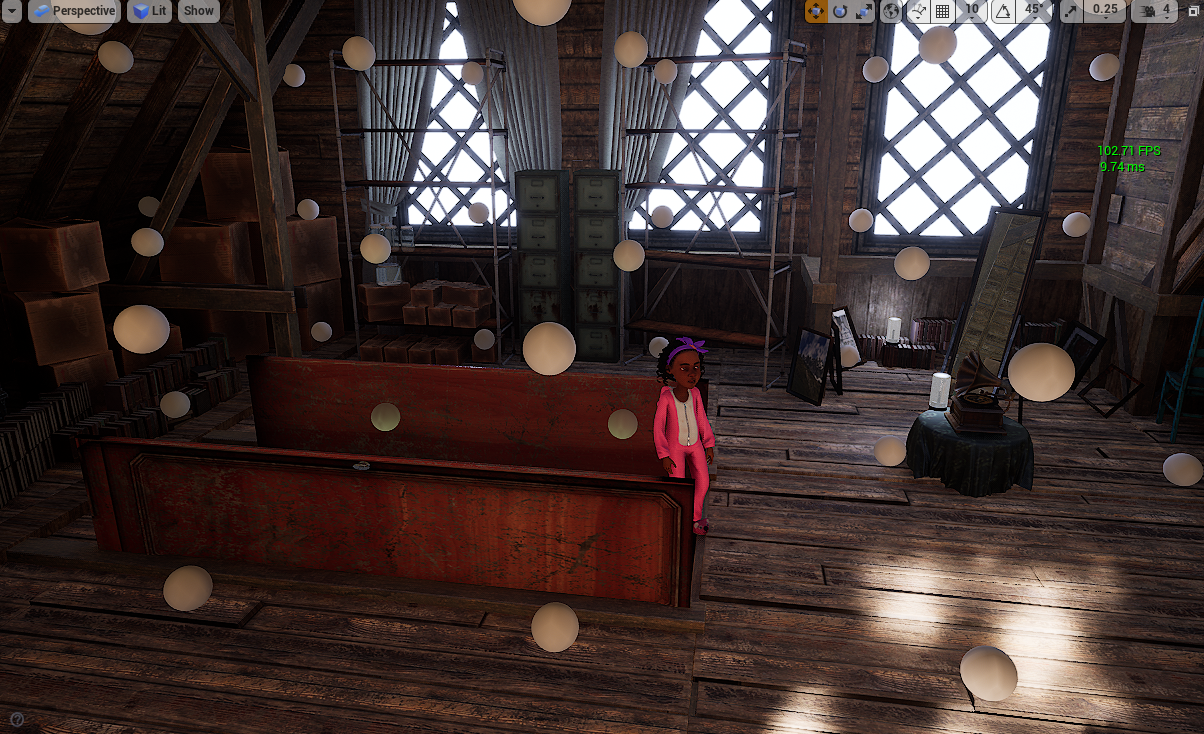
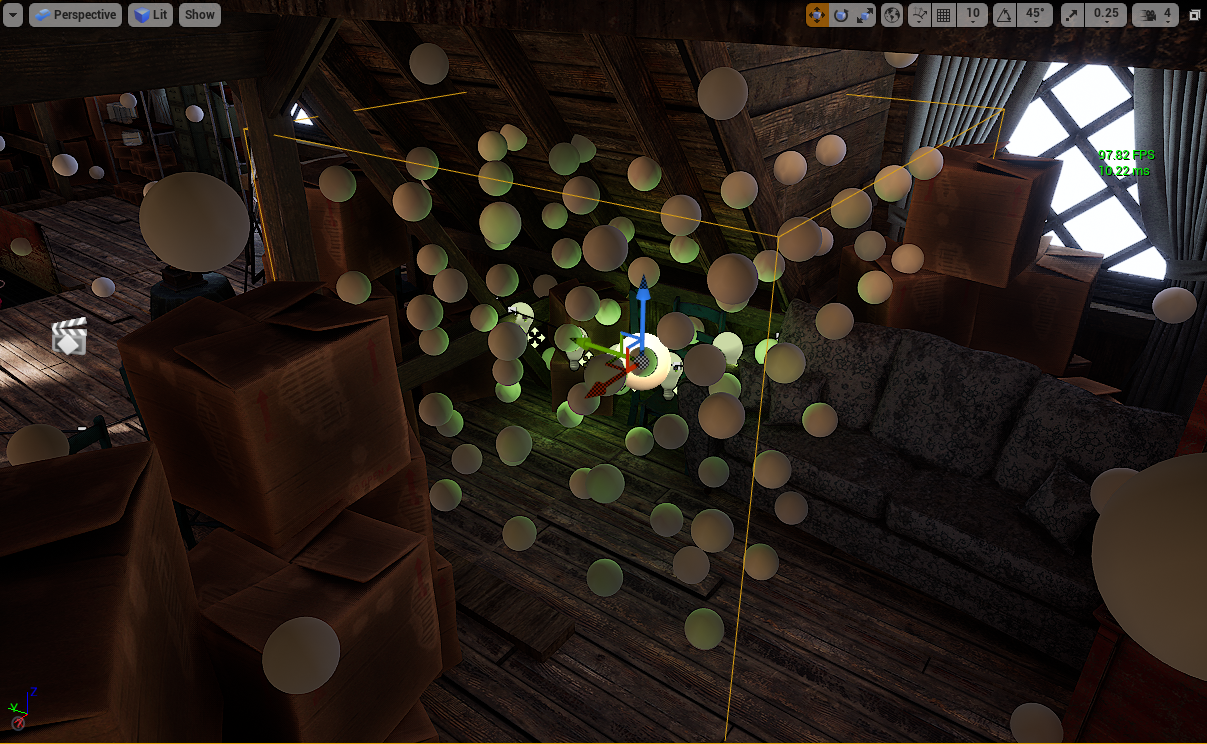
Probe visualisation in the editor. Each sphere is one probe displaying its stored irradiance, which makes probe spacing and any misplaced probes immediately visible.
Vite's integration
Vite's DDGI is not the stock 4.27 launcher plugin. It inherits NvRTX's engine-side integration, which reaches into the ray tracing pipeline rather than sitting alongside it. The practical differences:
Probe-based ray-traced reflections. Reflection rays can sample probe irradiance for their secondary bounce instead of returning black or falling back to a cubemap. This substantially improves RT reflection quality and is one of the larger visual wins in the fork. See Ray-Traced Reflections.
Continued optimisation work on the DDGI update path as part of each release.
Composition with the rest of the RT effect suite, so DDGI, RTXDI and RT reflections can all be active.
Setting up
Set up Dynamic DDGI in a level
Confirm ray tracing is enabled for the project. DDGI needs DXR support.
Enable the plugin path with
r.GlobalIllumination.ExperimentalPlugin 1, either from the console, from code, or inDefaultEngine.ini.Place a DDGI volume actor so that it encloses the playable space you want lit. Volumes cover volume, not surfaces — think about where the player and dynamic objects can go, not about where the walls are.
Set probe counts per axis. Start coarse and increase only where you can see the difference; probe count drives both memory and per-frame ray cost.
Enable SSGI with
r.SSGI.Enable 1to recover the contact detail the probe grid cannot represent.Verify in motion, not in a still frame. DDGI's advantages are temporal — a screenshot will not show you the stability difference against a denoised technique.
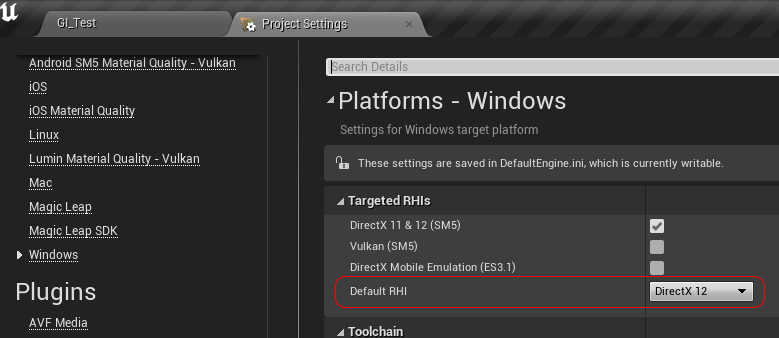
Step one, and the step people skip. Project Settings → Platforms → Windows → Targeted RHIs must be DirectX 12; ray tracing in 4.27 is DX12-only.
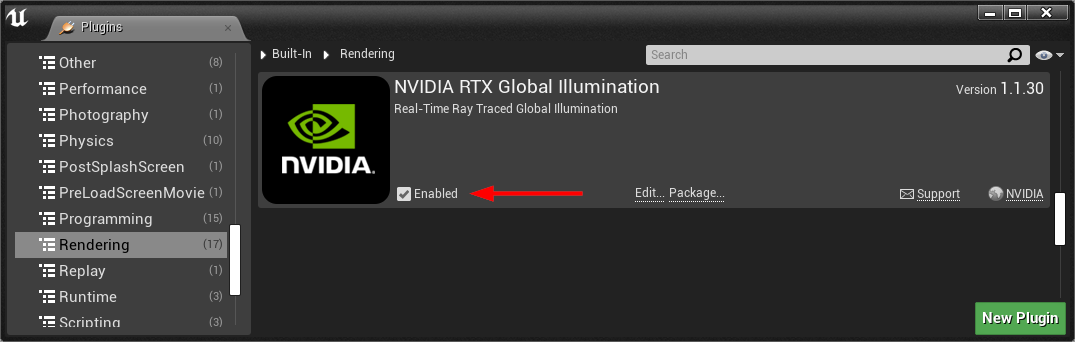
The GI plugin path under Built-In → Rendering. Vite ships this engine-side, so this is the in-engine plugin, not the launcher 4.27 plugin — do not install that one alongside it.
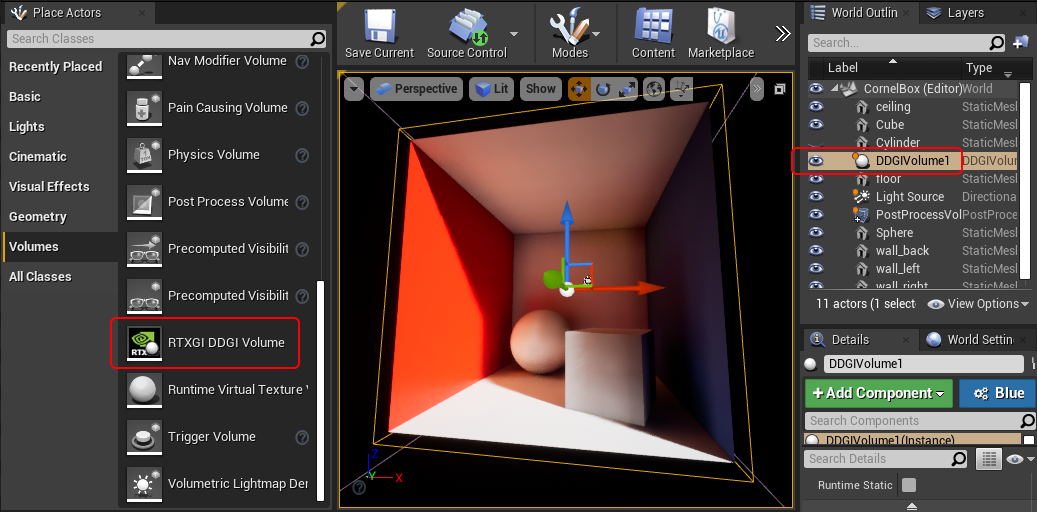
A DDGI volume in the level. Volumes cover space, not surfaces — size them around where the camera and dynamic objects can actually go.
Volume settings
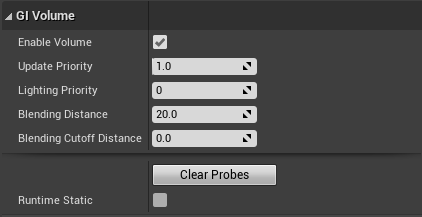
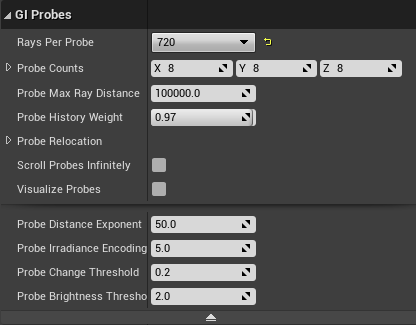
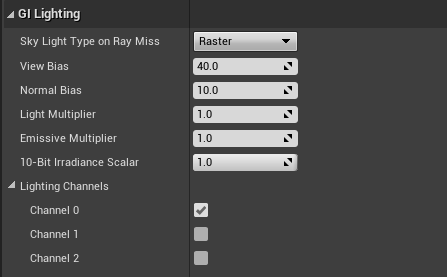
Volume, probe and lighting settings on the DDGI volume actor. Probe counts per axis are the control that drives both memory and per-frame ray cost.
Tuning
The settings that matter most, roughly in order of impact:
Probe density. The dominant cost and quality control. Denser grids resolve smaller lighting features and cost proportionally more in both rays traced and memory. Interior spaces with lots of small rooms need more probes than open exteriors.
Probe density against resolved lighting detail. Detail finer than the probe spacing does not exist in the representation at any quality setting — that is what SSGI is for.
Volume placement and count. Several tightly-fitted volumes usually beat one large loose one. A volume that spans a whole level at low density wastes probes on solid geometry and starves the spaces that matter.
Rays per probe. Trades convergence speed against per-frame cost. Lower counts converge more slowly, which shows up as lag when lighting changes rapidly — a door opening onto a bright exterior, for instance.
Hysteresis / update rate. How quickly probes accept new information. Faster response reduces lag but increases temporal variation.
Normal and view bias. The standard controls for trading light leaking against contact shadow darkening. If you see light bleeding through thin walls, increase bias; if contact areas look detached, reduce it.
Reference material
NVIDIA's original documentation and talks remain the best deep reference for the technique itself.
Ray-Traced Irradiance Fields:
Sample scene setup, and combined usage with SSGI:

Plugin settings deep dive:
Full official playlist:
There is also an internal DDGI reference document maintained by the team.
Sample scenes
Tech Demo Project — includes NVIDIA's official DDGI Cornell Box sample and a high-end DDGI plus SSGI cave scene.
Stylized Raytracing Demo — the 4K120 stylised target.
Abandoned Apartment and Attic Scene — NVIDIA's RTGI showcase scenes.