Ray-Traced Translucency and Caustics
These features come from NVIDIA's NvRTX 4.27 Caustics branch, which is Vite's base. They are the most parameter-heavy part of the renderer, so this page is structured as a reference rather than a narrative.
These are the most expensive effects in the ray tracing suite, and none of them fit inside Vite's performance targets at 4K. They are documented here because the NvRTX lineage provides them and some projects will want them for cinematics, marketing captures or specific set pieces.
Translucency modes
Stock UE4 ray-traced translucency forces all translucency through the ray tracing pipeline, which makes unsupported primitive types such as Cascade particles disappear, and produces refraction behaviour that interacts unintuitively with content authored for rasterisation. Hybrid translucency solves this.
| Mode |
|---|---|
| Stock UE4 ray-traced translucency off |
| Stock UE4 ray-traced translucency on |
| Hybrid Translucency 1 — ray-traced translucent reflection only |
| Hybrid Translucency 2 — ray-traced translucent reflection and refraction |
Hybrid modes require the Hybrid Translucency checkbox in project settings, because they permute the base translucency shaders. The corresponding shader support switch is r.RayTracing.HybridTranslucencySupport.
Mode 2 — reflection only
Traces several layers of translucency to an off-screen surface, then composites them as part of normal raster translucency. It loses order-independent transparency and refraction relative to full ray-traced translucency, but it is no worse than raster in those areas while delivering ray-traced reflections and shading.
Console variable | Purpose |
|---|---|
| How many overlapping ray-traced translucency levels are tracked |
| World-space separation at which geometry counts as a different translucency layer. Too small and hybrid translucency will not appear, or z-fighting artefacts occur; too large and stacked layers incorrectly merge. |
| 0 full, 1 half vertically (interleaved), 2 half checkerboard (4-tap), 3 half checkerboard (2-tap vertical) |
Mode 3 — reflection and refraction
Mixes raster and fully ray-traced translucency, including reflection, refraction and OIT support. Cascade particles can coexist with ray-traced translucency without losing its advantages. Order-independent transparency is automatic in this mode.
This is the recommended mode for translucent meshes, used together with absorption.
Recommended settings for best visual quality:
In 4.27, when RT refraction is enabled under mode 3, per-material IOR is bound to the PBR-based refraction index input; the material's Refraction Mode input must be set to Index Of Refraction.
Mode 3 also lets you choose per-mesh whether a translucent static mesh participates in ray tracing at all. Meshes excluded from ray tracing render through rasterisation, which lets you mix ray-traced and rasterised translucency in the same scene and can improve performance by reducing ray tracing pipeline workload.
Additional notes for mode 3:
r.RayTracing.Translucency.HybridDepthThresholddoes not apply. User.RayTracing.Translucency.PrimaryRayBiasinstead to bias depth when determining layer ordering.Cascade and Niagara emitters spawning opaque meshes may disappear when fully occluded by ray-traced translucent meshes, because some particle types cannot generate the BVH data hardware ray tracing requires. This is a known stock UE4 behaviour that hybrid mode 2 does not change.
Half-resolution refraction is available via
r.RayTracing.Translucency.HalfRes: 0 full, 1 half checkerboard with weighted colour reconstruction, 2 half checkerboard interframe, 3 half checkerboard with average colour reconstruction. These reconstruction techniques are intended for use under TAA and need careful tuning under DLSS, which can amplify pixel-level reconstruction artefacts.
Translucent absorption
With absorption enabled, thicker objects made of the same material appear less transparent, which is the physically correct behaviour and a large fidelity win on glass and liquids. Absorption is a per-material option, so objects with and without it render together.
Enable translucent absorption
Ensure ray-traced translucency is enabled.
Set
r.RayTracing.Translucency.EnableAbsorption 1, or check Enable Absorption in the post process volume.In the material editor, check Ray Traced Translucency Absorption on each material that should use it.
Throughput culling reduces cost by discarding low-contribution ray paths:
Console variable | Purpose |
|---|---|
| Higher values cull more refraction rays. May introduce artefacts. |
| Higher values cull more reflection rays. May introduce artefacts. |
| Set to 1 to eliminate double-shading artefacts on transparent reflections where actors occlude background. |
Depth of field from primary rays
Rasterised depth of field handles translucency poorly, particularly where Cascade particles intersect translucent glass. Ray tracing makes accurate cinematic DOF achievable.
Enable ray-traced depth of field
Use a cine camera and apply depth of field as normal.
Collect every translucent material in the camera frustum, including translucent particles. For each root material, check Output Translucency Depth and ensure Translucency Depth Opacity Threshold is lower than the material instance's opacity parameter.
Set
r.RayTracing.PrimaryRays.IncludeDOF 1.
Enhanced translucency mode 3, RT translucent reflection and refraction, and translucent absorption are all strongly recommended alongside RT DOF. DLSS is supported automatically.
Mesh caustics
Renders interactive caustics for translucent and metallic objects. Supports all four UE4 light types, multiple light sources, reflective and refractive caustics, dispersion and soft caustics.
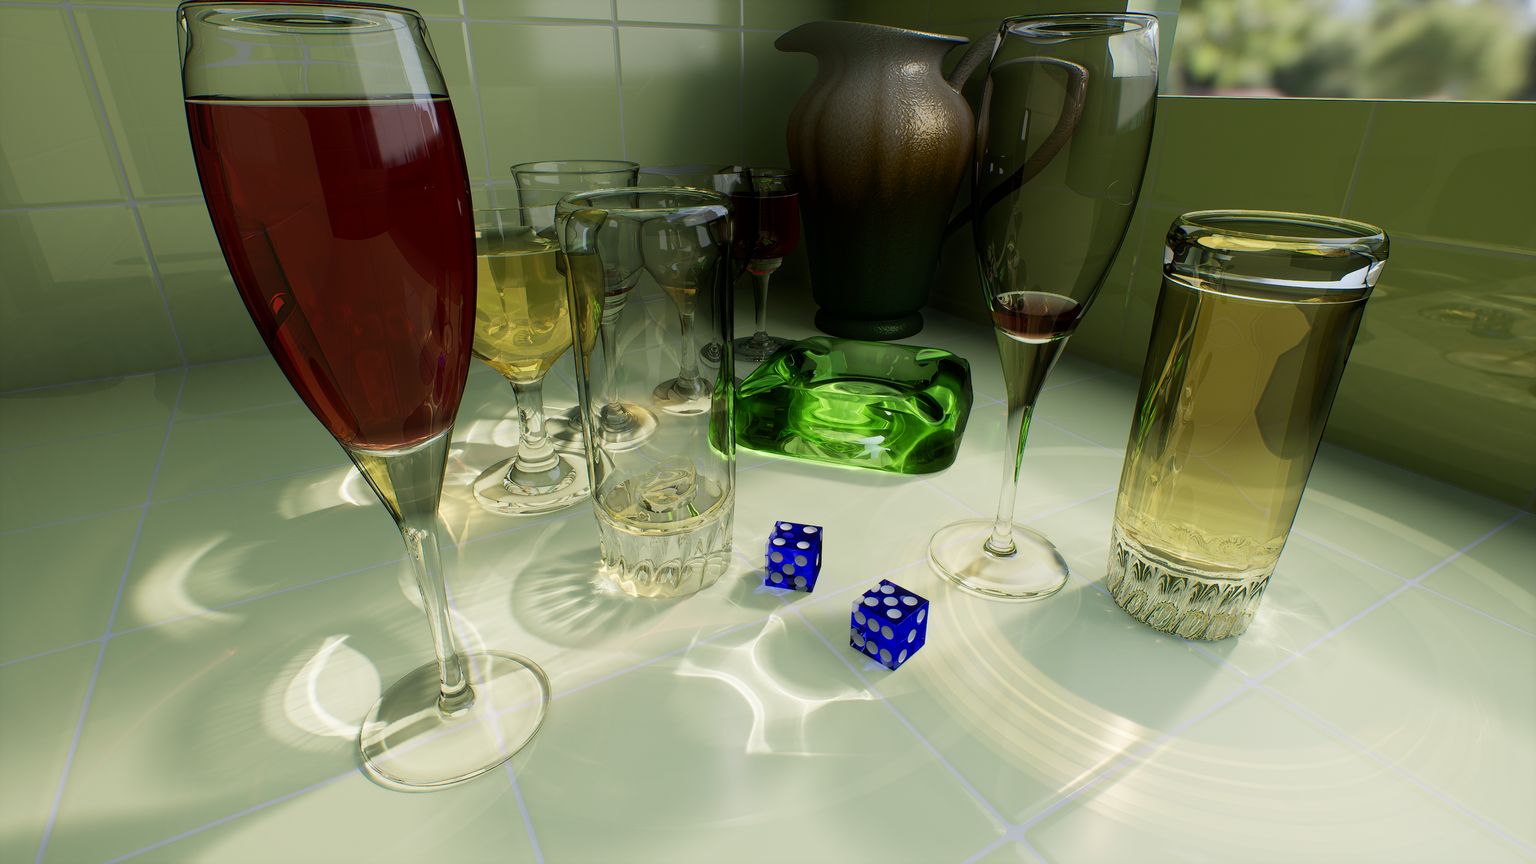
The POV-Ray Glasses scene. Every bright pattern on the tile is a refractive caustic, traced rather than authored.
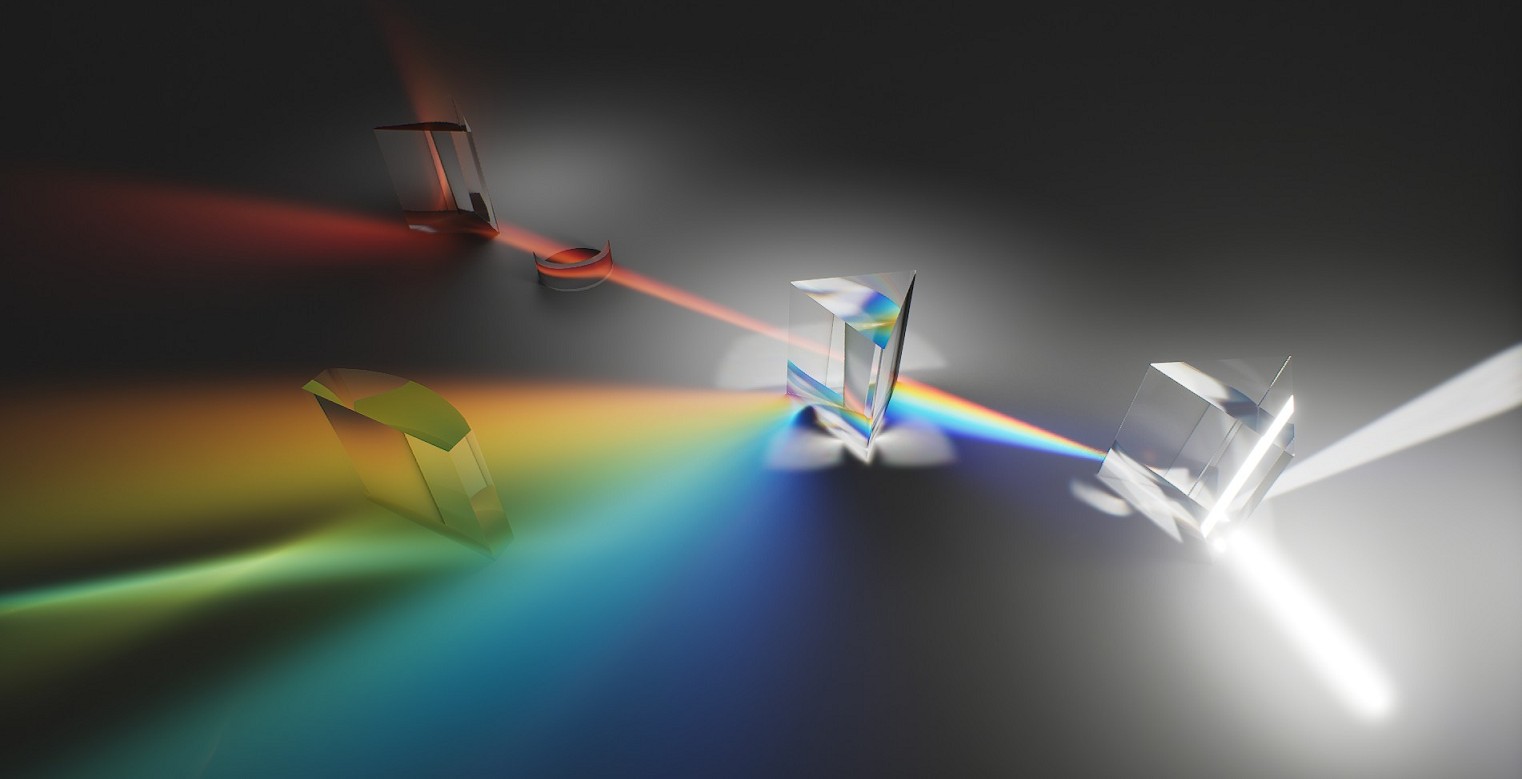
Dispersion. Requires Ray Traced Caustics Dispersion Amount above 0 in the material root node together with r.RayTracing.MeshCaustics.EnableDispersion 1.
Enable mesh caustics
Enable ray tracing.
Check Enabled under Ray Tracing Mesh Caustics in the post process volume, or set
r.RayTracing.MeshCaustics.Enable 1.In light properties, check Cast Mesh Caustics.
For metallic materials, check Cast Ray Traced Reflection Caustics. For translucent objects, check Cast Ray Traced Reflection Caustics for reflective caustics and Cast Ray Traced Refraction Caustics for refractive caustics.
Feature settings
Where a console variable is set to -1, the post process volume controls the actual value.
Console variable | Purpose |
|---|---|
| Reflective caustics for transparent objects |
| 0 refractive only, 1 refractive plus reflective first bounce, 2 reflective for arbitrary bounces |
| Enables dispersion. Requires Ray Traced Caustics Dispersion Amount greater than 0 in the material root node. |
| Colour samples used for dispersion |
| Sample count for soft caustics. Requires Mesh Caustics Softness greater than 0 in light settings. |
| Higher quality soft caustics algorithm |
To expose dispersion amount per material instance, check Ray Traced Caustics Use CustomData 0 As Dispersion Amount and connect a scalar to the Custom Data 0 channel, which makes the parameter tweakable at runtime.
Performance tuning
The key to performance is limiting photon count. Set the view mode to Ray Tracing Debug → Mesh Caustics Debug Data, then set Debug Light Data Type to Photon Count. Around 100k photons produces decent results in typical cases. If the count is too high, increase Adaptive Photon Size and decrease Adaptive Variance Gain in the post process volume, and raise Final Cull Threshold and Mid Cull Threshold until caustics begin to disappear.
Console variable | Purpose |
|---|---|
| Culls low-contribution rays |
| Culls low-contribution rays |
| -1 post process volume, 0 full, 1 half, 2 quarter resolution |
| Target screen-space photon size. Smaller is more detailed and more expensive. |
| Higher values suppress flickering |
| Temporal filtering to reduce flicker |
| Higher is more stable but can introduce lag or ghosting |
| Limits bounce count; raises performance for translucent objects |
Water caustics
Renders interactive caustics for water areas from ponds to open sea. Supports all four light types, multiple lights, reflective and refractive caustics, dispersion, soft caustics and cascaded caustics maps.
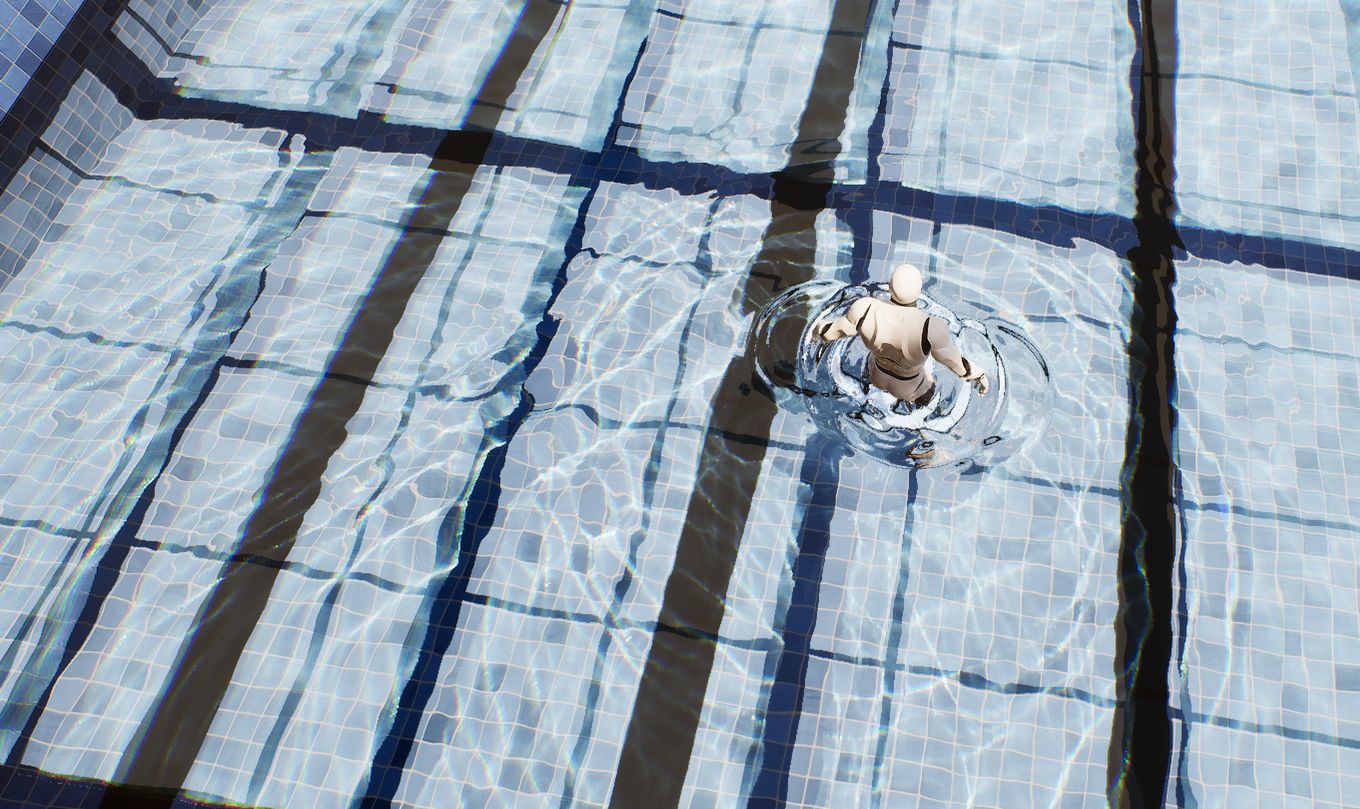
The Swimming Pool scene under a single directional light. The caustics respond to surface disturbance because they are traced against the water mesh each frame.
Enable water caustics
Enable ray tracing.
Select a water caustics type in the post process volume, or set
r.RayTracing.WaterCaustics.Typeto 1 or 2.In light properties, check Cast Water Caustics.
On the water surface static mesh actor, check Evaluate Ray Tracing Water Caustics under the Ray Tracing tab. The water surface material must use a Translucent blend mode.
Choosing an algorithm
Photon Difference Scattering (type 1) is flexible and works with all light types UE4 supports. It needs relatively high-resolution caustics maps to produce sharp patterns, so for large surfaces such as seas and large lakes, enable cascaded caustics maps alongside it. Cascades keep caustics sharp near the camera while rendering more cheaply at distance.
Procedural Caustic Mesh (type 2) produces very sharp caustics even from relatively low-resolution maps. It does not work with cascaded caustics maps, because it does not need them. It is usually faster than PDS, but it does not support area lights and can leave artefacts on the edges of caustics receivers.
Settings
Console variable | Purpose |
|---|---|
| Set to 0 to disable reflective caustics |
| Set to 0 to disable refractive caustics |
| Cascade count, up to 4 levels. Type 1 only. |
| Caustics map size, default 2048. 1024 is often enough for a small pond and saves substantial performance. |
| Default 2. Reduce to 0 for a sharper result. |
| Set to 0 to capture the caustics map from above the camera rather than along the light direction. Directional lights only. |
| 1 full, 2 half, 4 quarter resolution |
| Initial photon size in PDS. Default 3. |
| Debug: draws photons as points |
| Set around -0.5 to ignore surface normals where cracks or seams appear |
| As above, for reflective caustics |
Restricting water caustics to a single dynamic light saves a great deal of performance; light distance culling and intensity fade are fully supported.
Caustics focus depends on mesh and normal strength: large waves or strong normal map values produce more dramatic caustics. To enable dispersion, increase Dispersion Intensity in the post process volume and tune Dispersion Offset.
Sample content
NVIDIA provides project files and packaged demos for these features:
Specific scenes: the POV-Ray Glasses scene for heavy refraction, a prism dispersion demonstration, the Swimming Pool scene for water caustics, and the Office scene mixing particles, reflections, refractions, mesh caustics and RTGI. See also Abandoned Apartment and Attic Scene in this manual.
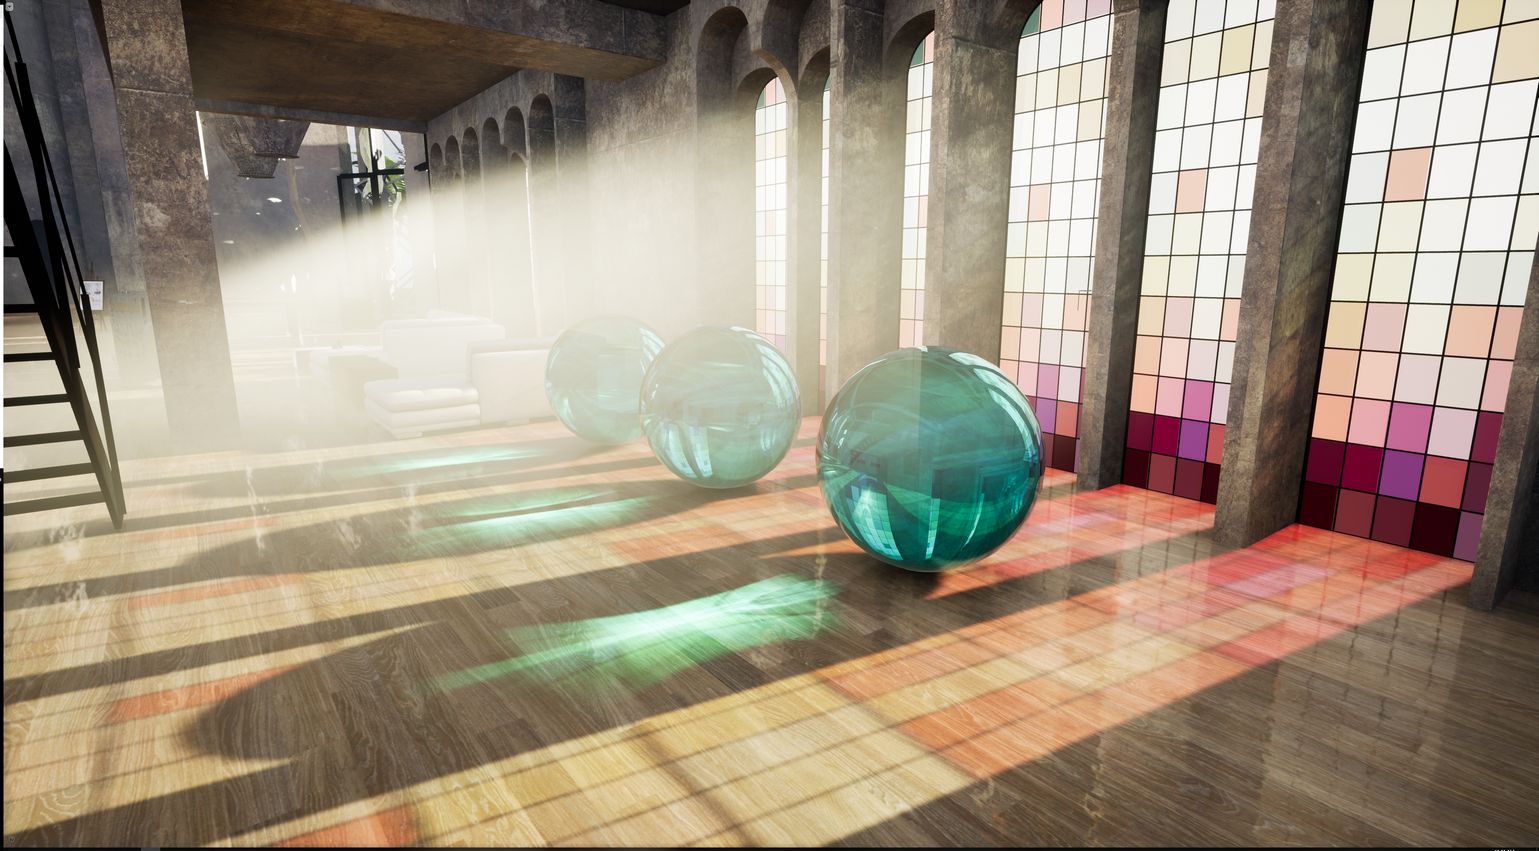
The Office scene is the one that exercises the whole stack at once: particles, translucent reflection and refraction, mesh caustics and ray-traced GI in a single frame.